
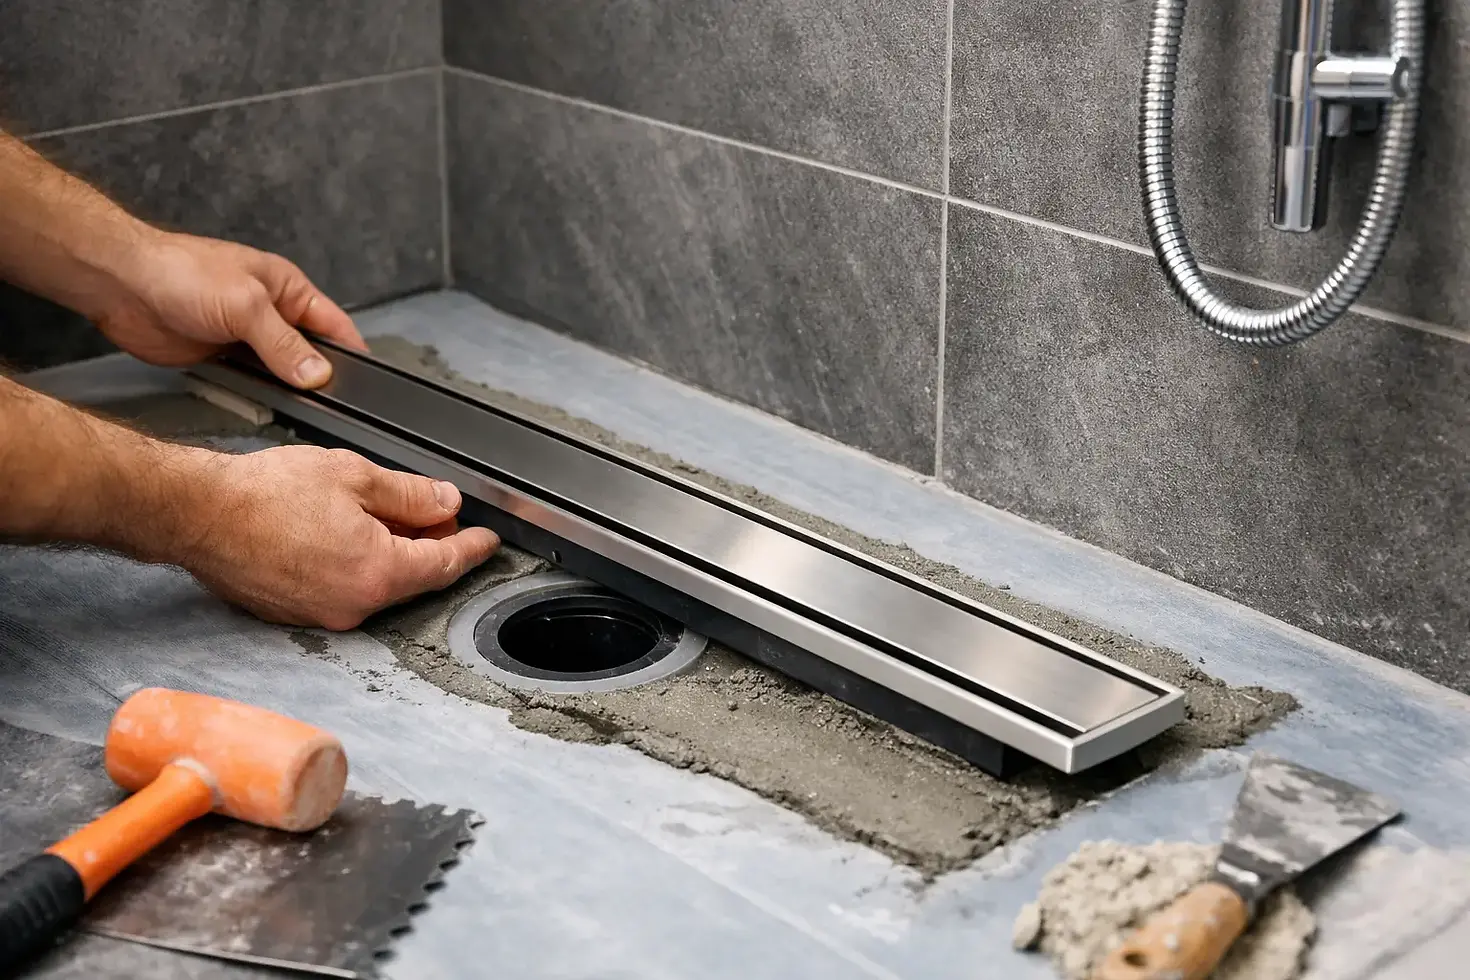
How to Install a Linear Shower Drain Right
A linear drain can give a shower a clean, modern finish, but the visible grate is the easy part. To install a linear shower drain correctly, the drain body, shower slope, waterproofing system, and tile layout must work together as one assembly. If any layer is out of place, the result can be standing water, cracked tile, clogged channels, or a concealed leak that damages the framing below.
For homeowners planning a custom shower, this is not a detail to leave until tile day. Linear drains affect the shower footprint, curb or curbless transition, plumbing location, and the type of waterproofing method used. Proper planning protects both the appearance of the finished shower and the structure behind it.
Plan the Drain Before Building the Shower Pan
A linear drain is a long, narrow channel that collects water along one edge of the shower or at a central location. Unlike a traditional point drain, which requires the floor to pitch from every direction toward one small opening, a linear drain can allow one continuous plane of slope. That simplifies large-format tile layouts and can create a more accessible shower entry.
Drain placement comes first. A wall-adjacent drain is common because it lets the shower floor slope in one direction, away from the entry. It can also make a curbless design easier to execute. A drain at the shower entrance can work well in certain layouts, particularly where keeping water away from the bathroom floor is the main concern. Center placement is possible, but it may require multiple slope planes depending on the drain orientation.
Before selecting a drain, confirm the existing plumbing location, joist direction, subfloor depth, and available room for the trap and drain connection. In remodels, this investigation is especially important. Moving a drain line can require opening the subfloor, modifying framing within code limits, and coordinating with a licensed plumber.
The drain system should also match the waterproofing system. Some drains are designed to bond directly to a sheet membrane, while others are intended for liquid-applied membranes or traditional mortar-bed methods. Mixing products without verifying compatibility is a common source of failures. A complete system from one manufacturer is often the clearest path because the drain flange, membrane, corners, and sealants are engineered to work together.
Gather the Right Materials and Verify the Details
The exact materials depend on the drain and waterproofing method, but a professional installation generally requires more than a drain body and tile. The work typically involves the drain assembly, approved waterproofing components, a properly prepared substrate, thinset mortar compatible with the membrane and tile, patching or deck-mud materials for slope, and a tile edge or grate finish that fits the planned tile thickness.
The grate selection matters. Tile-in grates create a nearly concealed drain line, while stainless steel grates offer a more defined accent. Both can perform well, provided the channel remains accessible for cleaning. Confirm that the finished tile and setting material will sit at the correct height relative to the grate. A grate that sits too low collects water at its edges; one that sits too high becomes a noticeable trip point and can interfere with drainage.
Check local requirements before work starts. California projects may require permits or inspections when plumbing is moved or a bathroom is substantially remodeled. Waterproof shower assemblies and drainage connections are not areas where shortcuts save money. They are areas where correct documentation, code-compliant work, and proper testing matter.
How to Install a Linear Shower Drain With Proper Slope
The floor must direct water to the channel without low spots. For a one-direction shower floor, the standard target is typically a minimum slope of one-quarter inch per foot toward the drain. The actual build-up must account for the shower size, drain location, tile thickness, and the available height at the bathroom entry.
Start with a clean, structurally sound subfloor. Remove weak material, old adhesive, and debris. Repair deflection issues before installing tile components. Tile and grout cannot correct a flexible floor, and no waterproofing membrane can compensate for a subfloor that moves excessively.
Set the drain body at the precise elevation required by the manufacturer. This is where careful measuring pays off. The drain must be level along its length, even though the shower floor slopes toward it. If the channel itself is out of level, water will favor one end, leaving debris and standing water at the other.
Connect the drain to the plumbing and secure it so it cannot shift during mortar work. The connection needs to be accessible for inspection before it is buried. Once the drain position is confirmed, form the sloped shower base using the selected method. This may be a pre-sloped foam tray cut to fit, a site-built mortar bed, or a substrate prepared with approved patching materials.
Preformed trays can save time and help maintain consistent slope when the shower dimensions fit the tray. They are less forgiving when walls are out of square, the drain is offset, or the shower requires a custom size. A properly built mortar bed offers more flexibility, but it requires experienced hands to create a flat, consistently pitched surface without birdbaths.
Use a straightedge to check the plane from the far wall to the drain. The surface should be flat within the plane, with no dips that trap water. Do not assume a floor is correct because it looks sloped from across the room. Measure it.
Waterproofing Is the Real Leak Prevention System
The tile surface is not waterproof. Grout is not waterproof either. The waterproof membrane behind and beneath the tile is what protects the shower structure.
After the sloped base is ready, install the approved membrane and connect it to the drain flange exactly as the system requires. Sheet membranes need properly overlapped seams and sealed corners. Liquid-applied membranes need the correct wet-film thickness, full coverage at transitions, and the required number of coats. Both systems require special attention at wall-to-floor changes, corners, benches, niches, and pipe penetrations.
A linear drain has long connection points at the floor, so the waterproofing tie-in deserves close inspection. Do not rely on excess thinset, caulk, or grout to solve a poor membrane connection. Those materials are not substitutes for a manufacturer-approved waterproof bond.
Before tile is installed, perform a flood test when the assembly and local requirements allow it. Temporarily plug the drain below the waterproofing level, fill the shower base with water, and mark the waterline. After the required test period, inspect for a drop in water level and check adjacent areas below or around the shower for moisture. A successful flood test is one of the best opportunities to find a problem before it becomes an expensive repair.
Tile Layout Should Follow the Drain, Not Fight It
Linear drains are popular partly because they work well with larger tile. A single-plane slope can allow longer tiles to run cleanly toward the drain without the awkward cuts often required around a center point drain. Still, tile size should be selected based on the actual shower slope and drain position.
Large-format tile works best when the floor is truly one plane. If the shower floor has multiple planes, smaller tile may be the better choice because it can follow the changes in pitch without lippage. Mosaic tile provides excellent traction and conforms easily to complex slopes, but it has more grout joints to maintain.
Dry-lay key tile lines before setting material is spread. Centering a grout joint or a full tile at the drain can create a more intentional finish. Plan wall tile, niche placement, curb lines, and drain alignment together. A drain that is technically functional but ends with narrow slivers of tile along the walls will still look like an unfinished decision.
Use the correct mortar coverage on the shower floor and avoid filling the drain channel with thinset or grout. After installation, protect the grate and channel during remaining construction. Drywall dust, mortar debris, and paint residue can clog the drain before the shower is ever used.
Common Linear Drain Installation Mistakes
Most linear-drain problems come from rushed preparation rather than the drain itself. The frequent issues are a channel that is not level, insufficient floor slope, an incompatible waterproofing connection, and tile installed before flood testing.
Another mistake is designing a curbless shower without confirming the available floor recess. A barrier-free entry needs enough vertical room to create proper shower slope while keeping the bathroom floor transition safe and code-conscious. In some homes, that means recessing the framing, adjusting the bathroom floor assembly, or revising the design. It depends on the structure, not just the preferred look.
Maintenance should also be considered. Choose a grate that can be removed without damaging tile, and make sure the channel can be cleaned. Hair, soap residue, and hard-water deposits collect in every drain system. A removable grate makes routine cleaning practical and helps the drain keep performing as designed.
A linear shower drain is a precision component in a larger waterproof assembly. When the plumbing, slope, membrane, and tile are built with care, the finished shower looks clean and drains the way it should for years. For a custom shower or full bathroom remodel, experienced tile and waterproofing installation is the difference between a sharp-looking feature and a costly hidden failure.


Comments