
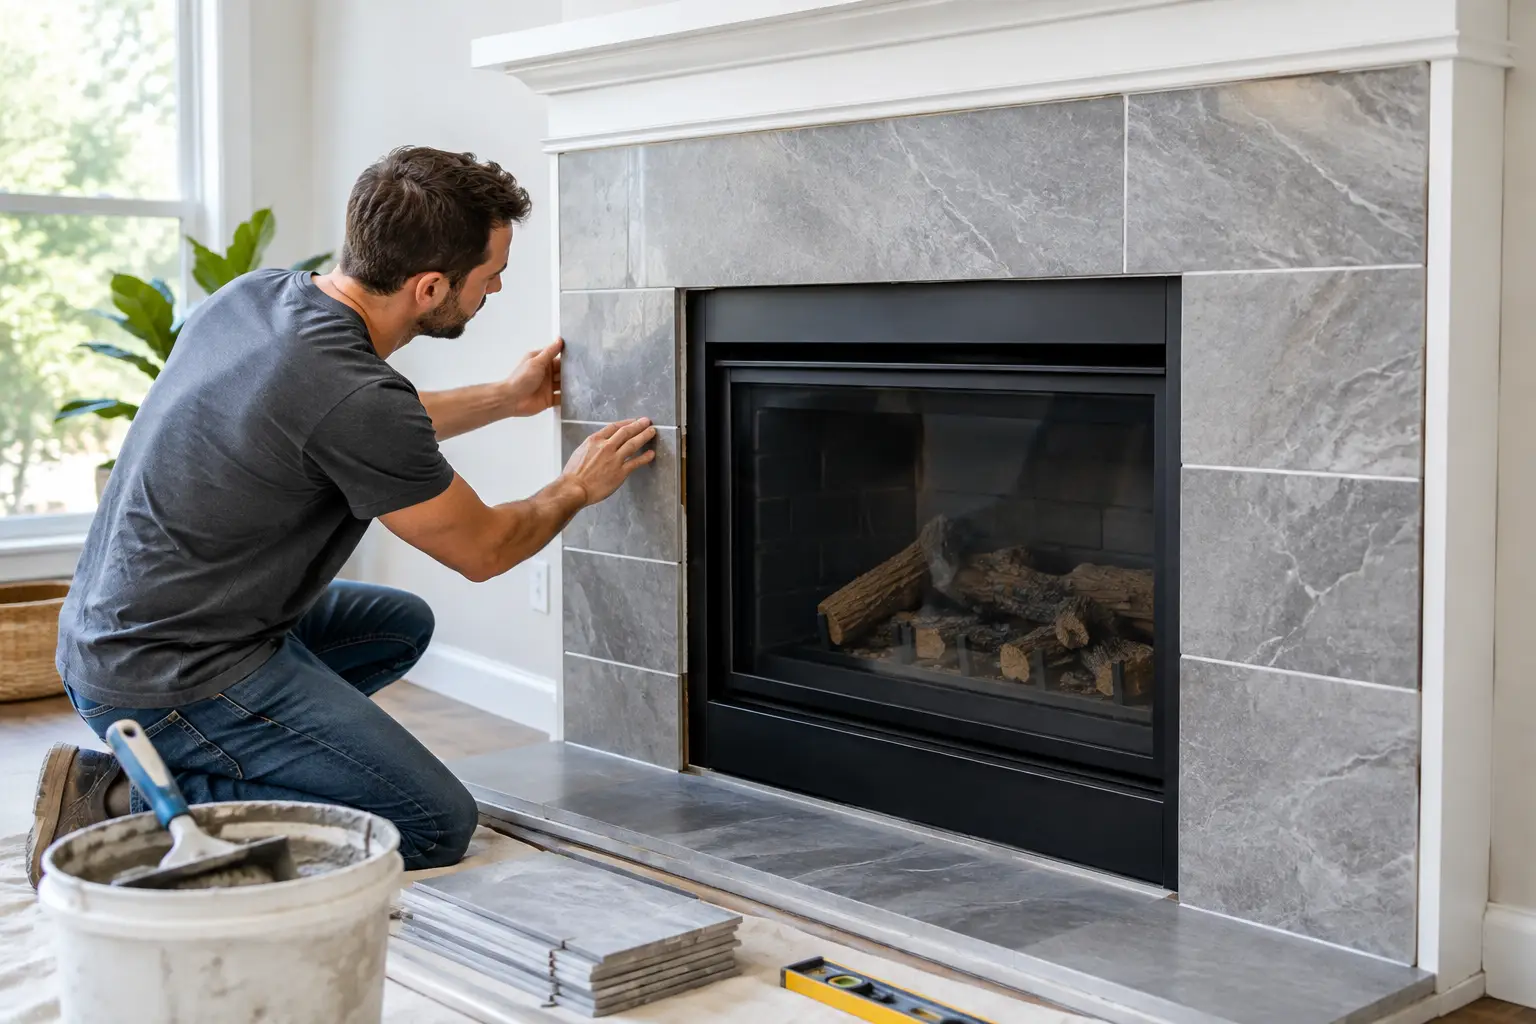
How to Tile a Fireplace Surround the Right Way
A fireplace surround is a small area with a big visual job. Crooked cuts, uneven tile spacing, or the wrong materials stand out immediately because the fireplace is often the focal point of the room. Knowing how to tile fireplace surround surfaces correctly starts with treating the project as more than a decorative upgrade. The substrate, heat exposure, layout, and finish details all need to work together.
A well-installed tile surround can give an older fireplace a clean, updated appearance and hold up for years. The key is disciplined preparation. Tile can only look as good as the surface behind it.
Start With Fireplace Safety and Material Selection
Before selecting tile, identify the type of fireplace and review the manufacturer’s clearance requirements. Wood-burning fireplaces, gas fireplaces, inserts, and electric units all have different heat conditions. Tile itself is generally heat-resistant, but the setting materials, surrounding wall assembly, trim, and combustible finishes may not be appropriate at every distance from the firebox.
For a wood-burning fireplace, use noncombustible materials where required and maintain the clearances specified for the firebox, insert, or stove. Do not assume that a previous painted drywall surround meets current requirements. If the project involves changing the firebox opening, mantel, hearth, or venting, confirm local code requirements before work begins.
Porcelain, ceramic, natural stone, and many glass tiles can work well on a fireplace surround. The best choice depends on the desired appearance and how much cutting the layout requires. Large-format porcelain delivers a clean, modern look with fewer grout joints, but it demands a very flat substrate. Natural stone creates depth and character, though some varieties need sealing and can vary in thickness. Small mosaic tile can follow irregular surfaces more easily, but the additional grout lines create a busier finish.
Choose a thinset mortar rated for the selected tile and application. Premixed mastic is not the right choice for areas exposed to fireplace heat. If installing natural stone, use mortar appropriate for the stone color and type to avoid staining or show-through.
Inspect and Prepare the Surround
Preparation determines whether the installation stays flat, bonded, and crack-free. Remove loose tile, crumbling mortar, wallpaper, damaged drywall, and any finish material that prevents a sound bond. The goal is a clean, stable, noncombustible surface where required by the fireplace manufacturer and local building standards.
A surround often needs repair before tile is installed. Check the wall with a long straightedge. High spots can make large tiles sit proud, while low spots create lippage between adjacent pieces. Correct significant irregularities with an appropriate patching or skim-coat product. Do not try to make up major wall problems with extra thinset during installation. That approach makes it harder to keep tile flat and properly supported.
Cement backer board may be needed when the existing surface is unsuitable or when the assembly calls for a noncombustible backing. Install it securely, tape the seams with alkali-resistant mesh tape, and embed the tape in thinset mortar. The board must be flat and properly fastened. Loose backer board will eventually show through as cracked grout or tile.
Protect the firebox opening and flooring before demolition or setting tile. Dust control matters, particularly in occupied homes. A professional installation should include clean edges, controlled cuts, and a work area that is protected throughout the project.
Plan the Tile Layout Before Mixing Mortar
The difference between an average surround and a finished-looking one is usually layout. Dry-lay the tile or create a full layout plan before spreading mortar. Establish the centerline of the fireplace opening, then determine whether the tile pattern should center on the opening, the full wall, or the mantel. Those are not always the same point.
For a simple stacked or running-bond pattern, avoid leaving narrow tile strips at the outer edges or above the firebox. Shift the layout slightly if needed so the cuts are balanced. With patterned tile, calculate where the pattern lands at the opening and corners. A centered pattern that ends in a tiny sliver cut can look worse than a slightly adjusted layout with full, intentional-looking pieces.
Use a level and laser line to mark horizontal and vertical reference lines. Do not rely on an existing mantel, floor, or firebox edge to be perfectly level. Older homes often have small inconsistencies that become obvious once straight grout lines are installed.
If the tile wraps into returns around the fireplace opening, decide how corners will be finished before installation begins. Options include bullnose tile, metal edge trim, mitered stone edges, or a clean caulk joint. Each option has a different cost, appearance, and level of labor. Mitered porcelain or stone can look refined, but it requires precise cutting and is more vulnerable to edge damage than a protected trim profile.
How to Tile a Fireplace Surround Step by Step
Once the surface is prepared and the layout is confirmed, begin setting tile from a stable reference point. Many installations start at the bottom center of the surround or directly above the firebox opening, depending on the pattern and support available. A ledger board can provide a straight starting line when the first row cannot rest on a level hearth.
Mix thinset mortar to the manufacturer’s instructions. Let it slake when required, then remix without adding extra water. Spread only as much mortar as can be covered while it remains workable. Use the notched trowel size recommended for the tile, then comb the mortar in straight, consistent lines.
Back-butter large-format tile and natural stone when needed. This means applying a thin coat of mortar to the back of each tile before setting it into the combed mortar on the wall. The process improves coverage and reduces the risk of hollow spots. Press each tile firmly into place with a slight sliding motion that collapses the mortar ridges.
Use spacers or leveling clips to maintain consistent joints and reduce lippage. Check the work frequently with a level and straightedge. Do not assume the first few rows are correct just because the tile appears aligned at a glance. A small error near the bottom can become a noticeable problem by the time the installation reaches the top of the surround.
Make cuts with a quality wet saw or a tool suited to the tile material. Measure every cut from the installed tile, not only from a paper plan. Walls, firebox openings, and corners are rarely perfectly square. Leave appropriate movement joints at changes in plane, around the firebox where required, and where tile meets other materials. These joints should be filled with color-matched flexible sealant rather than rigid grout.
Allow the mortar to cure according to the manufacturer’s instructions before grouting. Rushing this stage can disturb the tile bond or introduce moisture before the installation has stabilized.
Grout, Caulk, and Final Details
Select grout based on the tile joint width, tile finish, and maintenance expectations. Sanded grout is commonly used for wider joints, while unsanded grout may be suitable for narrow joints or tiles that could scratch easily. Many modern grout products offer improved stain resistance, but proper mixing and cleanup still matter.
Apply grout diagonally across the joints, packing them fully without dragging material out of the lines. Clean the tile face in controlled passes with a damp sponge. Too much water during cleanup can weaken the grout color and leave an uneven finish. After the grout has cured, use matching flexible sealant at perimeter joints, inside corners, and transitions to the mantel or adjacent wall materials.
Natural stone and some cement-based grouts may need sealer after curing. Sealer does not make stone maintenance-free, but it can help reduce staining and make routine cleaning easier. Avoid harsh acidic cleaners, especially on marble, limestone, travertine, and cement grout.
When Professional Installation Makes Sense
A straightforward ceramic tile surround may be manageable for an experienced homeowner with the right tools. The project becomes more demanding when it includes large-format porcelain, bookmatched stone slabs, uneven walls, a raised hearth, electrical changes, or a new mantel. Firebox clearances and combustible-material rules also leave little room for guesswork.
For homeowners in the Central Valley or Bay Area, Empire Tile & Stone approaches fireplace projects with the same focus used for detailed bathroom, kitchen, and stone installations: proper prep, accurate layout, clean cuts, and durable finishes. The finished surround should not only look sharp on installation day. It should remain secure, balanced, and easy to maintain long after the room is put back in use.
Before lighting the fireplace, allow mortar, grout, sealant, and any other surrounding materials to cure for the full period specified by their manufacturers. A little patience at the end protects the work that made the new surround worth doing.



Comments